Drag & Drop Multiple File Upload - Contact Form 7
Last Updated : November 28, 2023Introduction
Drag and Drop Multiple File Uploader is a simple, straightforward WordPress plugin extension for Contact Form7, which allows the user to upload multiple files using the drag-and-drop feature or the common browse-file of your webform.
Plugin - Installation
1. If the Free Version is currently installed, you will need to uninstall or deactivate it.
2. To install a Plugin from a .zip file, login to your Wordpress dashboard and click Plugins → Add New
3. In plugin page you will find 'Upload Plugin' button where you can select and then Upload "drag-and-drop-upload-cf7-pro.zip" file.
4. The resulting installation screen will list the installation as successful or note any problems during the install.
5. If successful, click Activate Plugin to activate it, or Return to Plugin Installer for further actions.
Plugin Setup
To add the upload field, go to Contacts → Add New when creating new forms, or click Contact Forms when adding it to existing forms.

→ Add New Upload
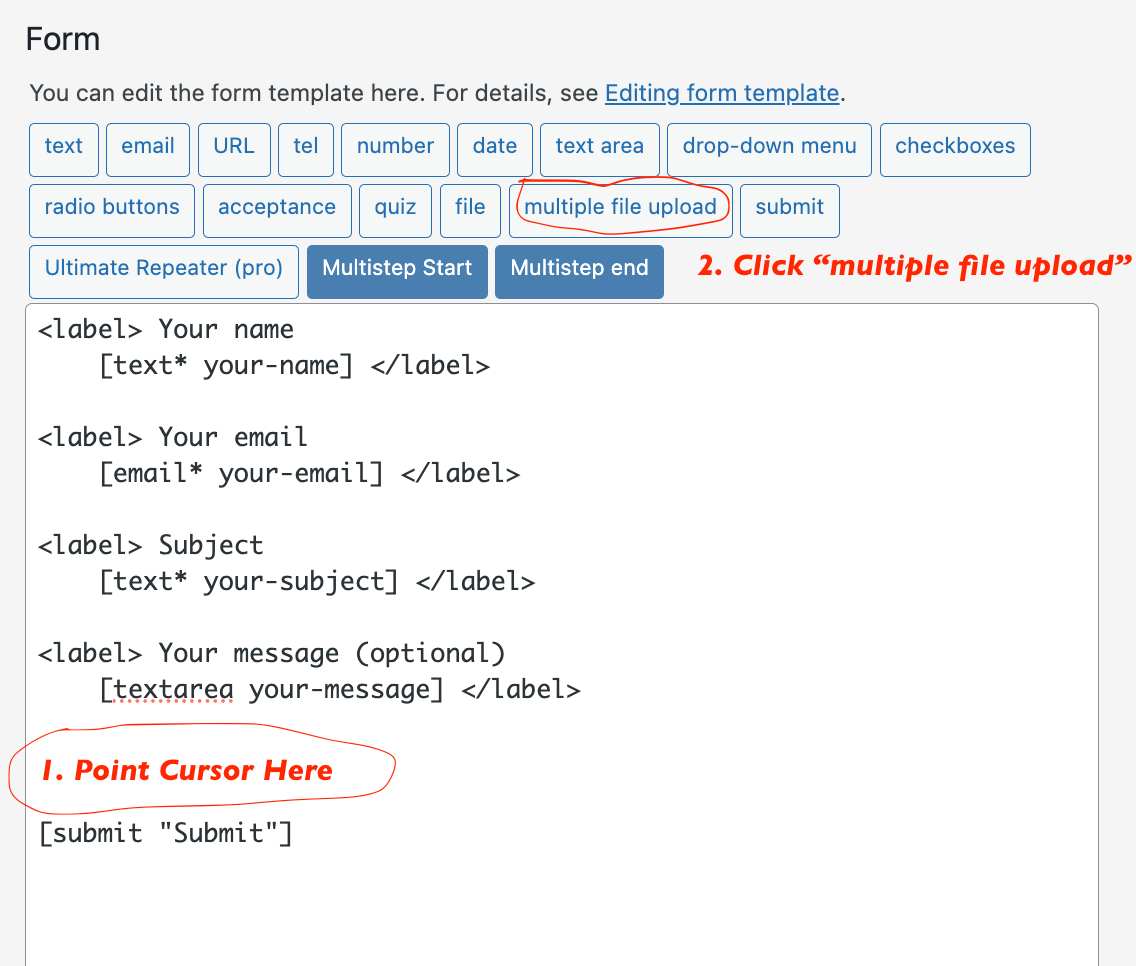
In textarea editor under Form tab.
1. Position the cursor where you want the upload to appear.
2. Then Click [multiple file upload] tag
‣ File Size Limit
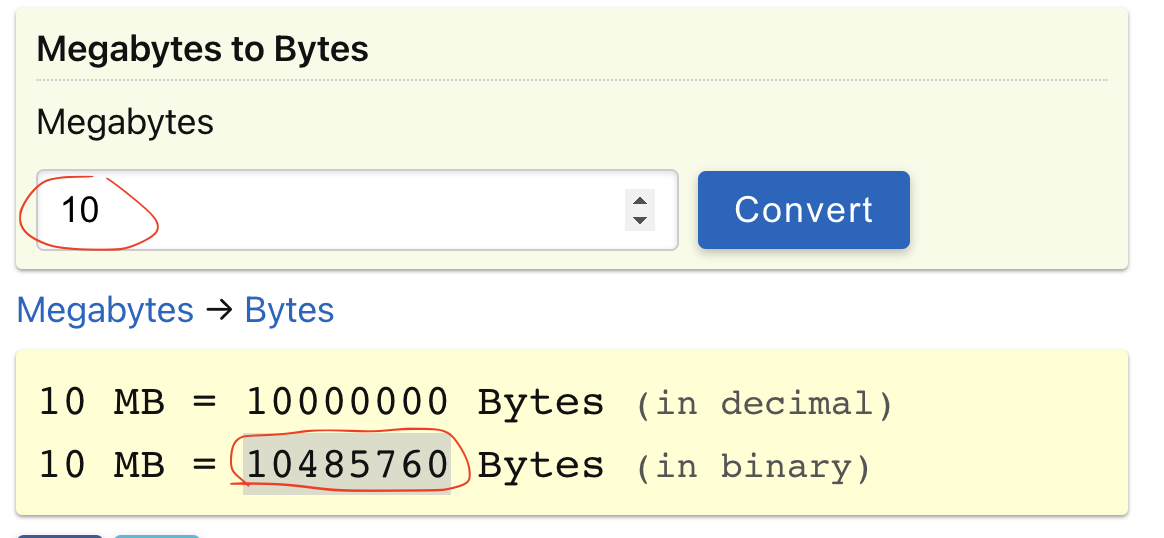
In File size limit (bytes) under Form tag generator, add your file size limit in bytes format.
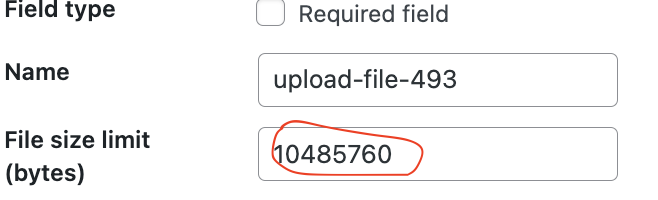
Example: Adding 10485760 is equivalent to 10MB (You can use this online converter)
‣ Add File Types
To specify specific file types, enter the extensions separated by '|' in the Acceptable file types field.
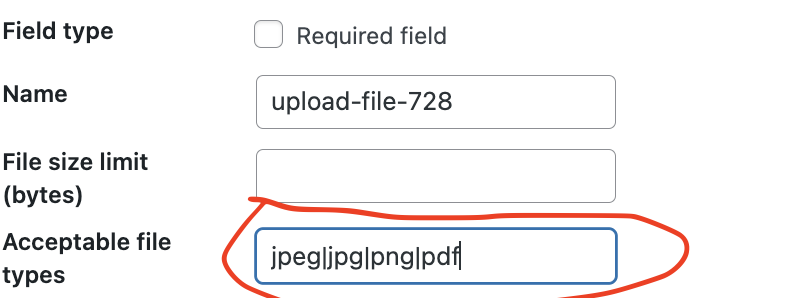
Note: If not provided, the default file types will be: jpg|jpeg|JPG|png|gif|pdf|doc|docx|ppt|pptx|odt|avi|ogg|m4a|mov|mp3|mp4|mpg|wav|wmv|xls
‣ Minimum & Maximum File Upload
You can specify the max and min limits for each upload in the (Min file upload & Max file upload) fields.
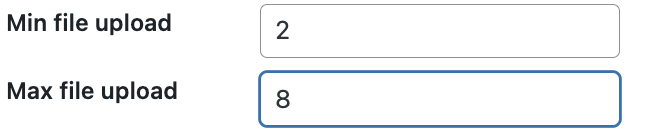
Note: If not provided, the minimum is 0, and the maximum is 5.
After configuring all the settings, you can click on [Insert Tag] button.
→ Email Attachments
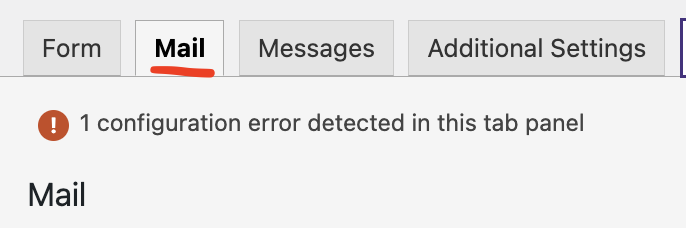
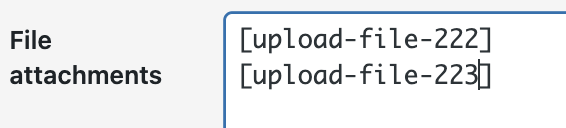
To attach uploaded files to an email, click [Mail] tab, and scroll down to find the "File attachments" field.
Required: Please double-check and ensure that this [Send file(s) as links] option remains unchecked.
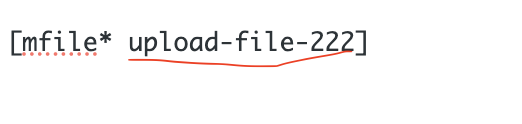
* For Single File Upload:
- Copy the name of the upload file you've created earlier and paste it into the 'File attachments' field.
For example in your [Form] you have the upload field name "upload-file-222".

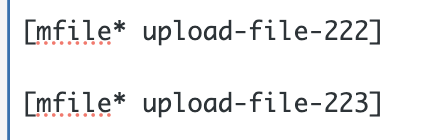
* For Multiple File Uploads:
- Copy all the upload file names and paste each one on a new line. (All the files from different upload fields will be merged as attachments in the email. [example])
Note: You cannot attach large files in most email, many email providers have attachment size limits (e.g., Google has a 20-25MB limit). So, if you are accepting large files, I recommend using the "Display File as Links" option. This will display all the files as links instead of attaching them."
→ Display File Links
Displaying file links in an email is particularly beneficial for larger files, as they cannot be attached to the email. To utilize this feature, please refer to the instructions provided below
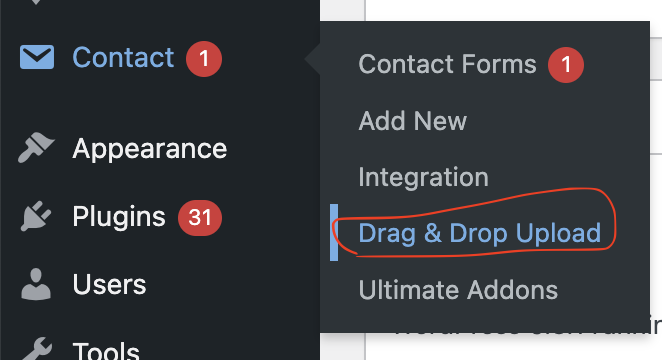
1. Go 'Contact → Drag & Drop Upload → Pro Features' then check Send file(s) as links?

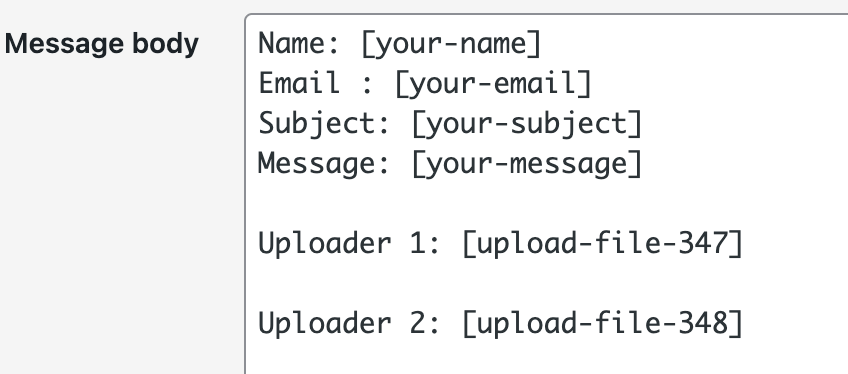
2. In the Message body section of your [Mail] tab within Contact Form 7, please include the name of the upload for which you want to display a link. (Like below)
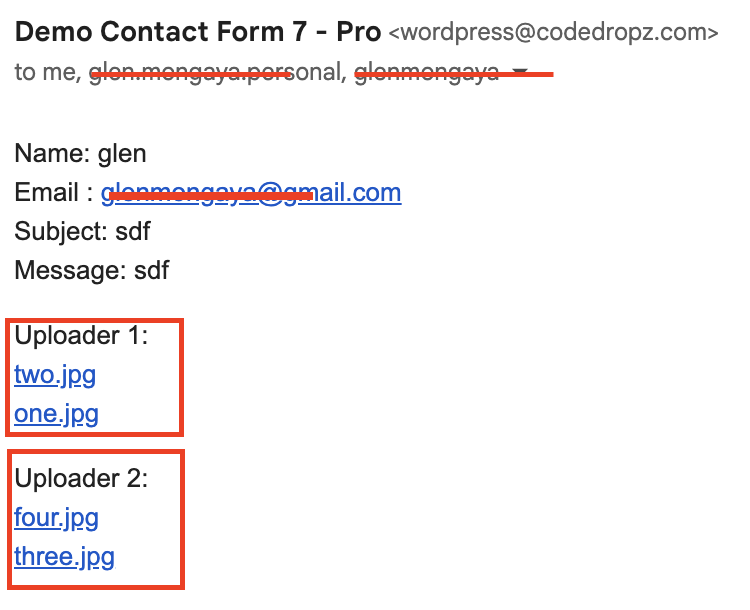
3. Display of email results.
Settings
The Drag & Drop Upload settings located in "Contact → Drag & Drop Upload"
→ Uploader Info
These settings mainly concern the text and display aspects of the uploader.
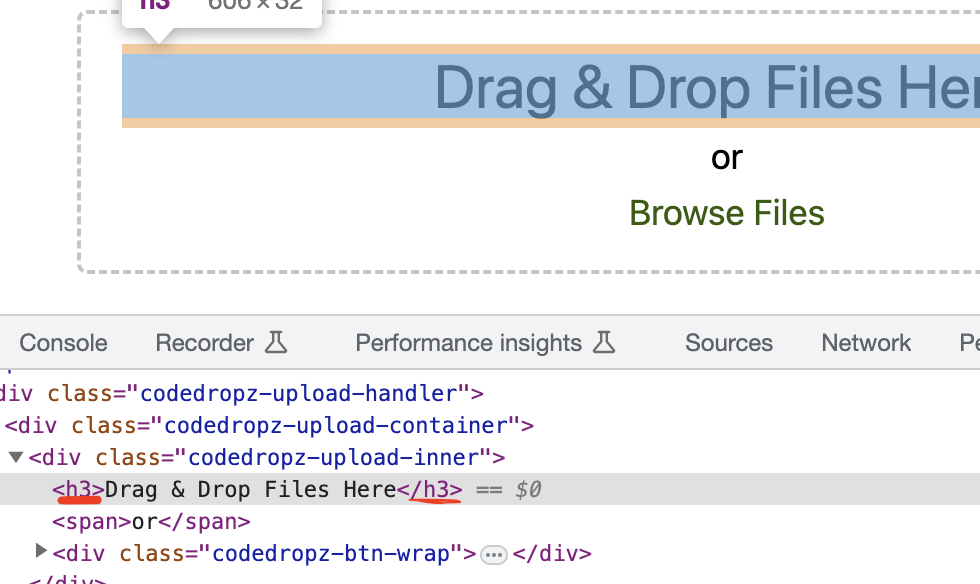
‣ Uploader Text
Heading Tag - You can select any element from h1-h6 span or div.
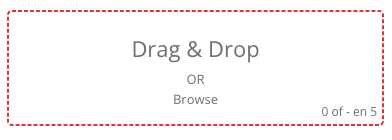
Drag & Drop Text - Modify the text for the browse button and drag & drop areas in the uploader.

‣ Change Border
Color - Here, you can customize the uploader's border color.

‣ Other Text
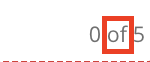
Of Text - You can modify the text 'of' located at the bottom right of the uploader, between the file counter.
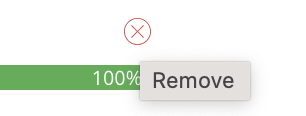
Deleting File - Customize the 'deleting...' text that appears when clicking the [x] icon.

Remove Title - Change the hover title when deleting the file.
→ Pro Features
‣ Change Filename
Customize the filename to suit your needs by utilizing the available tags.

1. Select tags below and use underscore (_) or hyphen (-) separator without any spaces.
Available Tags: {filename}, {username}, {user_id}, {ip_address}, {random}, {date}, {time}, {post_id}, {post_slug}, {cf7-field-name}
{filename} - Get the original name of the file.
{username} - Get the User Name (User must login to obtain the username).
{user_id} - Get the User ID (User must login to obtain the user_id).
{ip_address} - Retrieve the IP address of the user who has currently uploaded.
{random} - Generate a random number with up to 4 characters.
{date} - Retrieve the current date in the (m-d-y) format.
{time} - Retrieve the current time.
{post_id} - Get the page ID where the contact/uploader form is embedded.
{post_slug} - Get the page slug or name where the contact/uploader form is embedded.
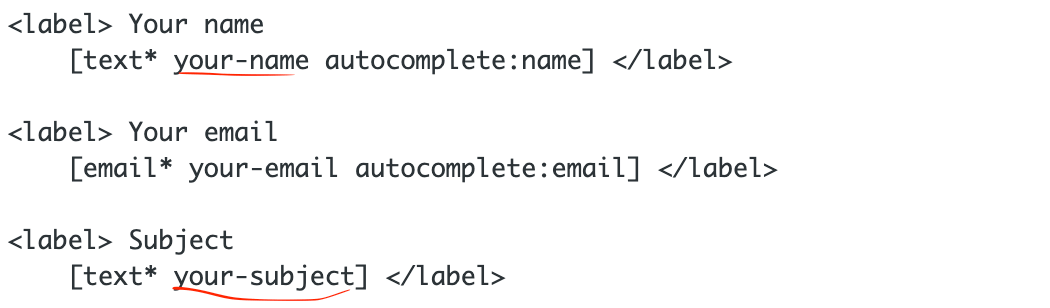
{cf7_field_name} - Substitute '{cf7_field_name}' with the real name of the CF7 field (e.g., '{your-name}', '{your-subject}').
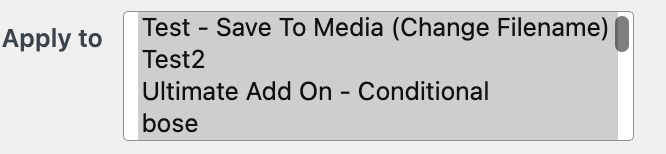
2. Choose the form to which you want to apply the filename amendments.
3. Suppose you have the filename 'file.pdf' with the settings: {filename}-{random}-{date}

‣ Change Upload Directory
In this setting, you can change the main or base upload directory. If not provided, all the files will be saved in '/public_html/wp-content/uploads/' directory. Simply follow the placeholder path as it's dynamically generated from your server.(see screenshot below)
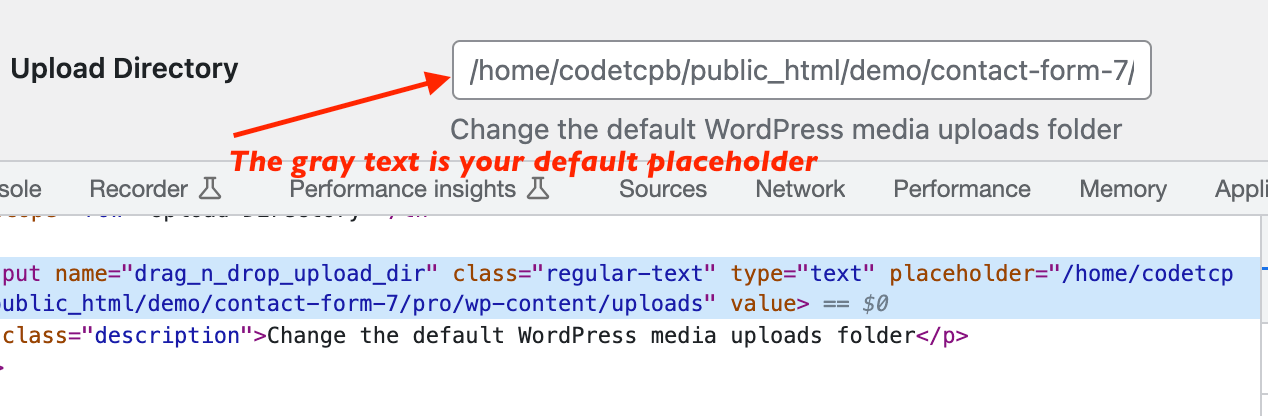
For example, if your placeholder looks like this '/home/codetcpb/public_html/demo/contact-form-7/pro/wp-content/uploads' and you want to change the path to '/public_html/custom-uploads' so that it's outside of the '/wp-content' folder.
Next, copy the default placeholder starting from 'home' up to 'public_html' and add "/custom-uploads" so your Upload Directory should now look like this: '/home/codetcpb/public_html/custom-uploads'. All the files will be uploaded inside the new custom directory.
‣ Display File Links
When this option is checked, it will display file links in the email. Refer to the [Display File Links] section for more information.
‣ Save Files To Media Library
If you enable this option, all the files or attachments will be added to your WordPress Media Library.
 →
→ 
‣ Change Upload Folder
On this settings, you will be able to change or add custom upload folder.
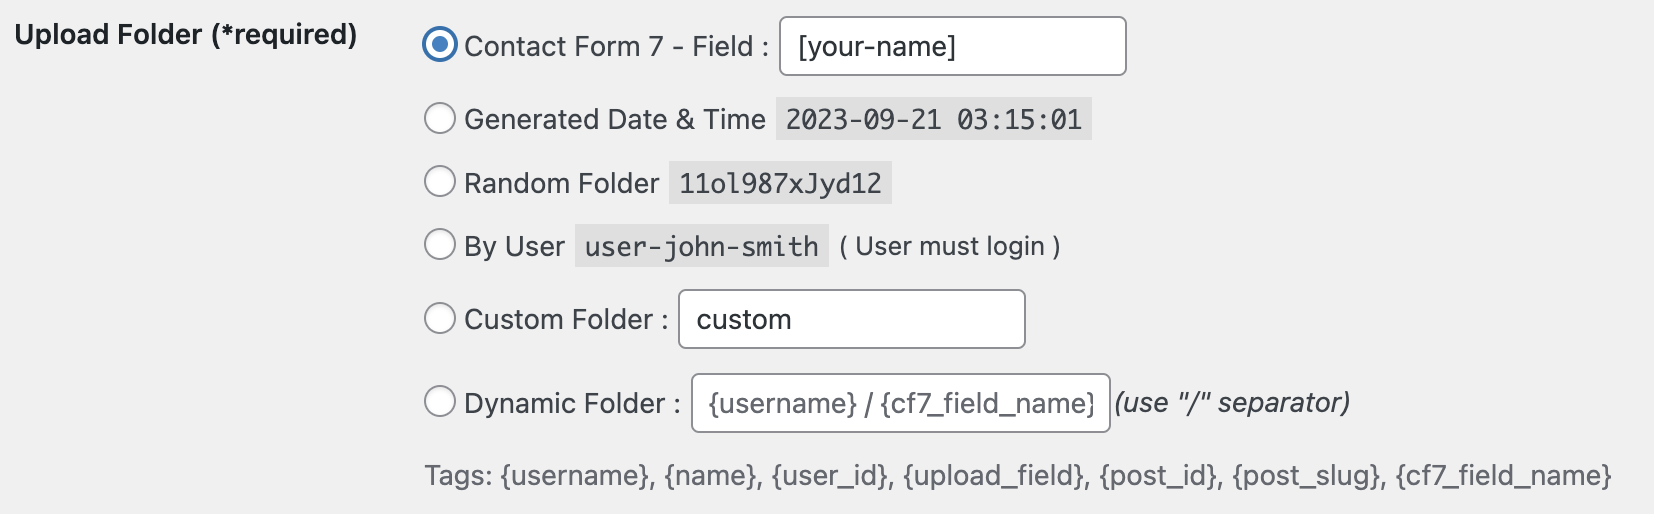
* Contact Form 7 - Field - Use Contact Form 7 tags and it should wrap with open "[" and close "]" ( e.g., [your-name], [your-subject] )
* Generated Date & Time - This will retrieve the current date and timestamp (ie: 2023-09-21 00:13:27).
* Random Folder - This will generate a random combination of numbers and/or letters.
* By User - Display the user name of the current Logged-in user.
* Custom Folder - Add custom name of the folder.
* Dynamic Folder - Input a custom folder name using tags(below) and dynamic values from Contact Form 7 fields. If you want to create complicated or customize folder structure, you should separate them with '/'.
Available Tags: {username}, {name}, {user_id}, {random}, {date}, {time}, {upload_field}, {post_id}, {post_slug}, {cf7_field_name}
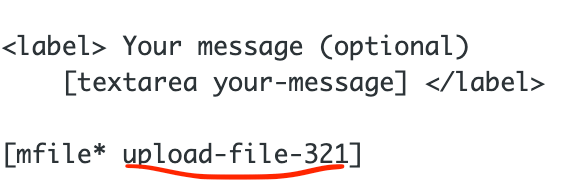
{upload_field} - This tag will get the name of your upload field like ( "upload-file-321", "uploads", etc ).
{cf7_field_name} - Substitute "{cf7_field_name}" with the real name of CF7 Field. Ensure it matches the names of Contact Form 7 fields. ( example: "{your-name}", "{your-subject}" )
basic example: {random}/{date}/{upload_field}/{your-name}
result: /11ol987xJyd12/2023-09-21/upload-file-321/glen/
‣ Compress Files
Enabling this setting will archive all your files into a zip file.
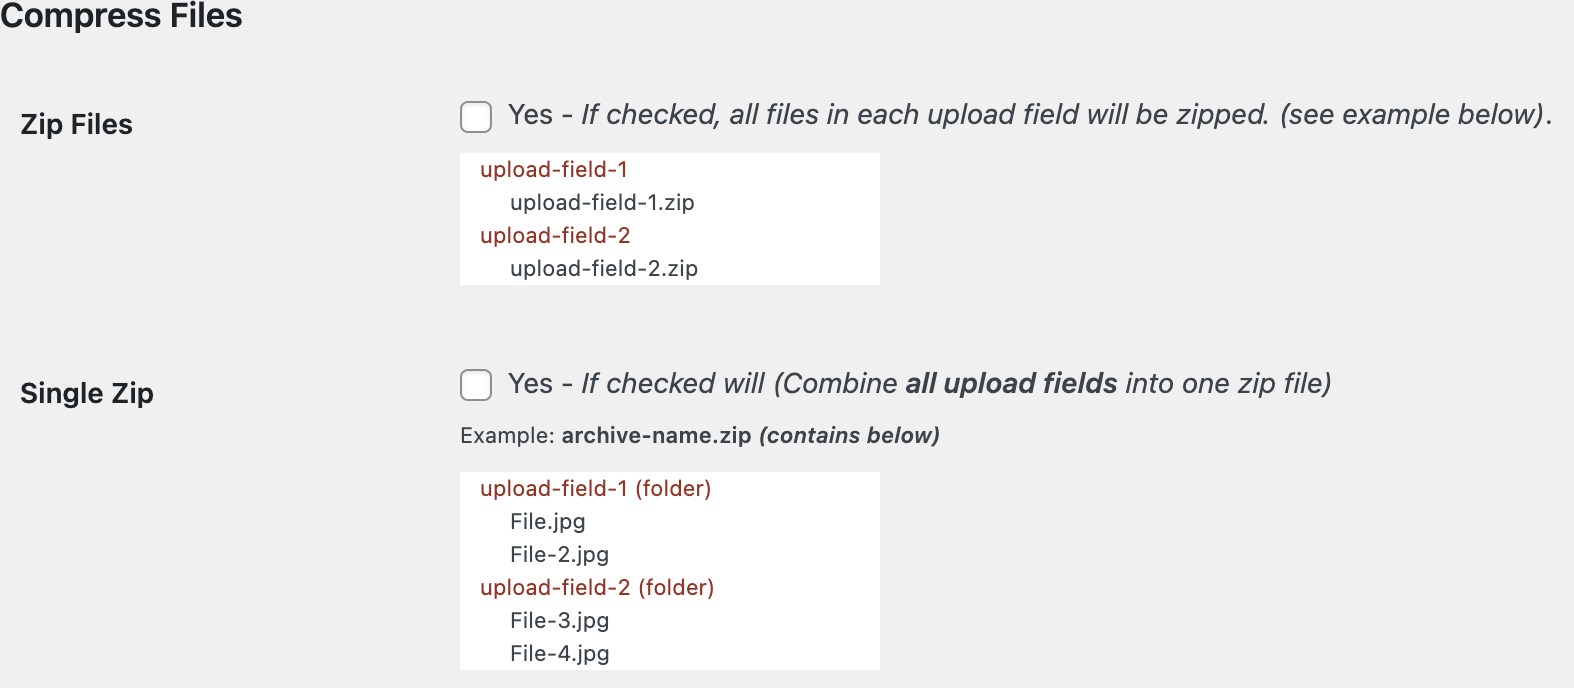
1. Check "Zip Files" option
2. The "Single Zip" will combine and zip all the files from different file uploads. (Optional or Not Recommended)
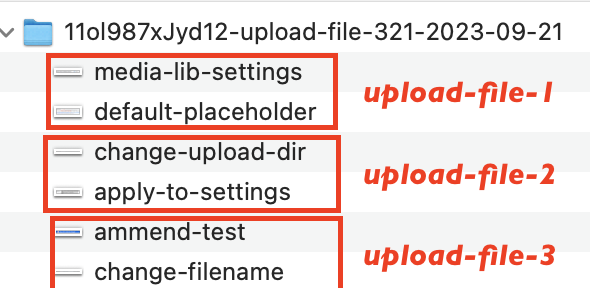
For example, you have 3 upload field names - [upload-file-1], [upload-file-2]-[upload-file-3]
Result:
Note: You will need to add this [dnd-zip-files] code in "Mail->Message body" or "Mail->File attachments" field
3. In "Zip Name" you can change the name of the zip using the tags, cf7_fields & upload name, just separate them with hyphen (-) separator.
Example: {random}-{upload_field}-{date}
Result: 11ol987xJyd12-upload-file-321-2023-09-21.zip
‣ File Deletion
This setting helps you set up the automation of file deletion.
Delete Temporary Files - When this checkbox is selected, uploaded files will be deleted in case the form fails or is tagged as spam. (recommended)
Auto Delete Files - If you don't want to store files, consider this option and choose an appropriate time to schedule the automation of deletion.
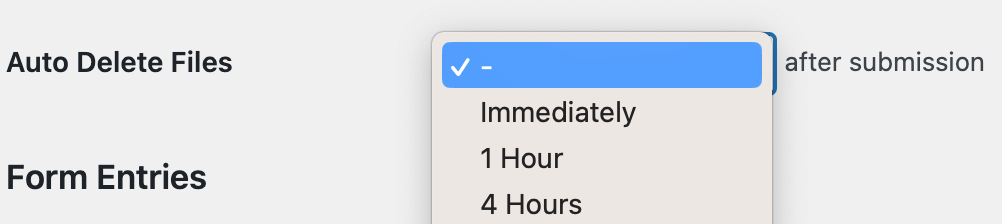
Note: Be cautious when using this option, as files will be permanently deleted.
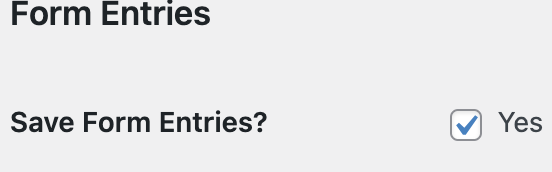
‣ Form Entries
Checking 'Save Form Entries?' will store and keep a record of information submitted through online forms. It's useful for data backup, retrieval, analysis, and reference. When enabled, the data submitted via forms is saved in a database for future access and use, which will then appear in the 'Form Entries' tab after the 'Error Message'.
 →
→ 
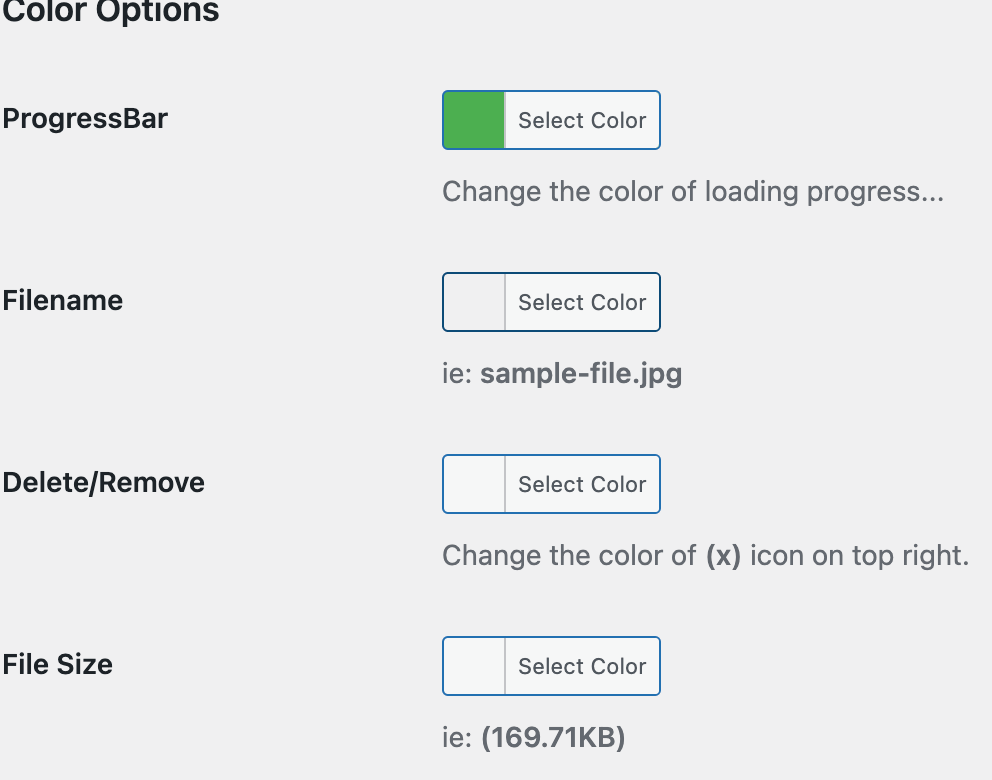
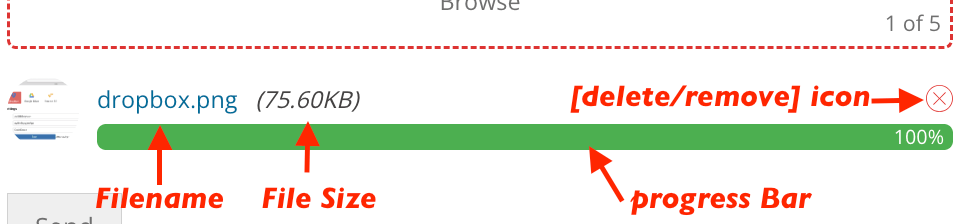
→ Color Options
Here, you can customize the colors of various uploader elements, such as the progress bar, filename, [x] icon, and file size.
 →
→ 
→ Chunks Settings
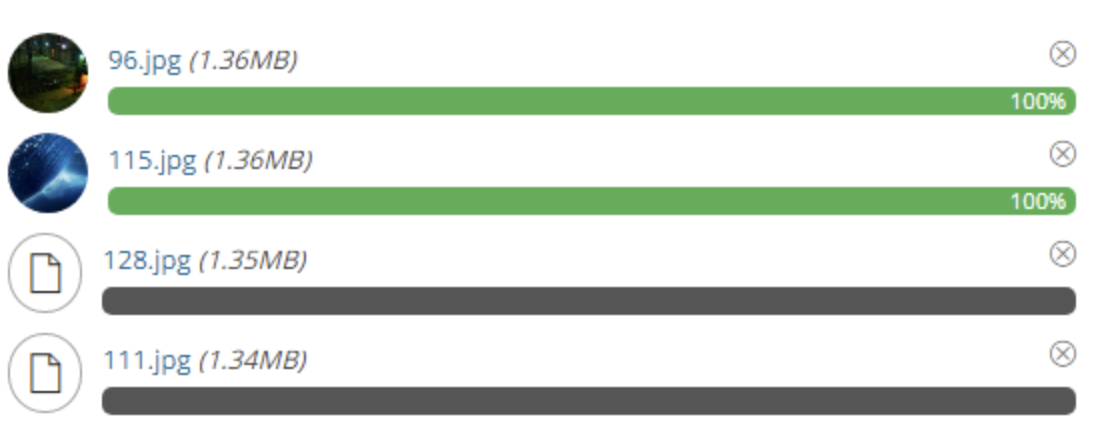
‣ Parallel / Sequential Upload
Adjust the number of files that can be uploaded simultaneously
‣ Chunks
What is Chunked Upload?
- Chunked upload is a method of breaking large files into smaller segments for more efficient and reliable uploading. Instead of uploading the whole file at once, it uploads smaller "chunks" sequentially. This approach allows for resumable uploads, reduced memory usage, and increased reliability, making it suitable for handling large files in web applications and services.
To allow large files you must use and enable chunks upload.
1. Set "Chunks Upload" to Yes.
2. Enter "Chunk Size" this should be bytes format, you may use MB to Bytes converter online.
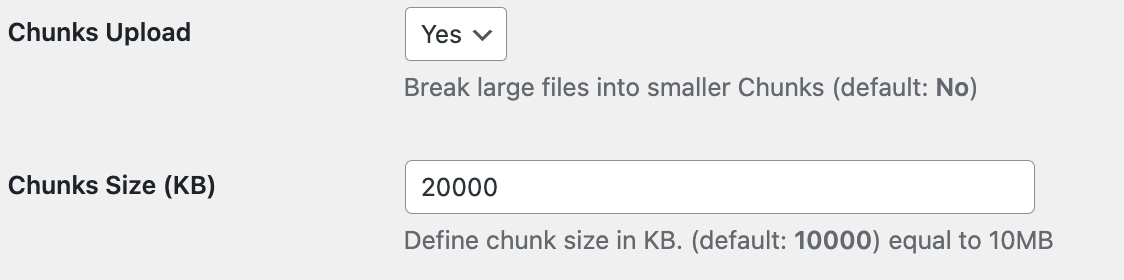
In the screenshot above,I set the chunk size to 20000(2mb) per chunks without the word kb.
‣ Max Total Size
You can set the maximum total size of all uploaded files. When the total file size reaches the limit, an error message will be displayed. If not provided the default max total limit is 100MB.
Please take note that you should add the word 'MB' after the number.
 →
→ 
→ Image Optimization (Standard Version Only)
‣ Resize Image
Resize Image - Please enter the desired width and height for the size, and separate them by x. (eg., 600x600)
Image Quality - Choose image quality from 1-100, recommended between 80-100. (The highest no. the better quality)
Keep Original File - When this option is checked it will keep the original file.
‣ Image Preview
Enable the 'Show image preview' option to display a preview of the image as soon as the user begins uploading.
You can also choose a different layout, whether it's the default or a column layout
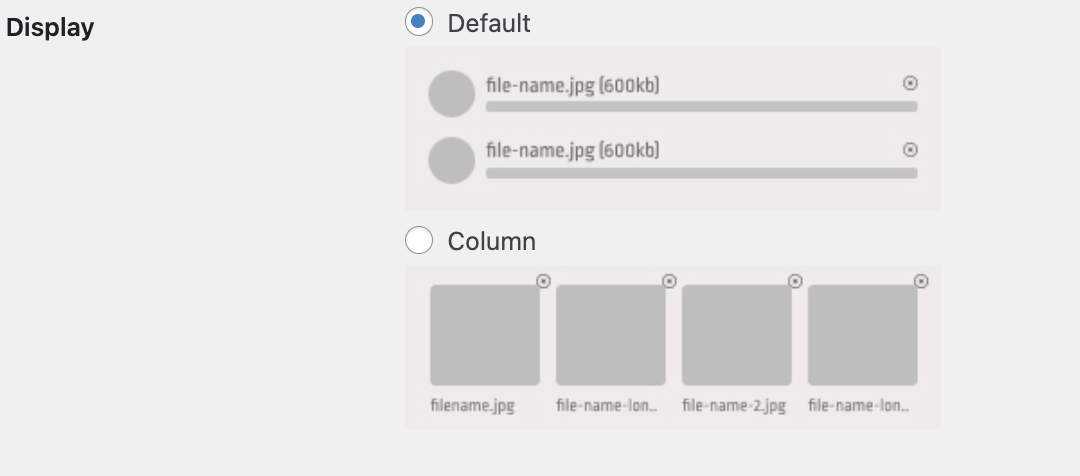
When choosing Column layout, you can also adjust the number of column.

→ Other Features
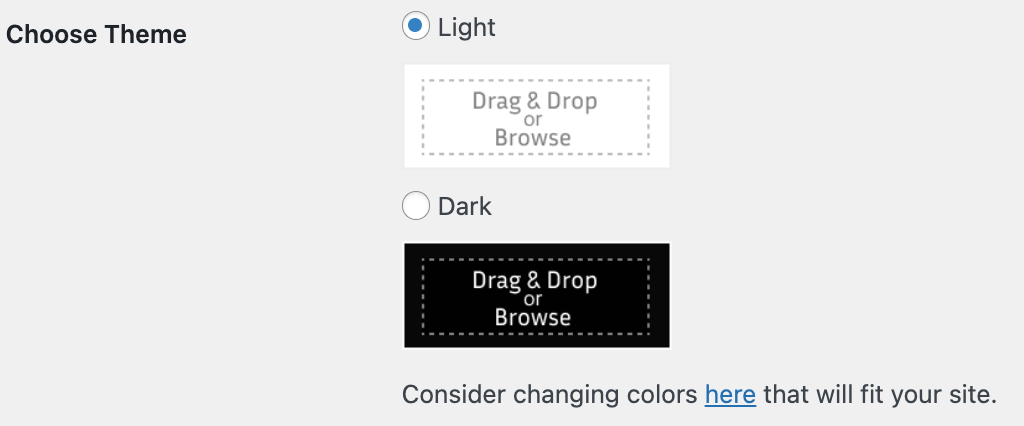
‣ Theme
Here, you can choose between the 'Light' and 'Dark' themes to match your website's style
‣ Other Features
Disable Button on Submission - This will disable the 'Submit' button while the form is being sent to prevent multiple submissions.
Hide File Counter - When this option is checked, it will hide the file counter at bottom right. → 
Overwrite File - When this option is checked, it will overwrite a file that already exists if they have the same filename."
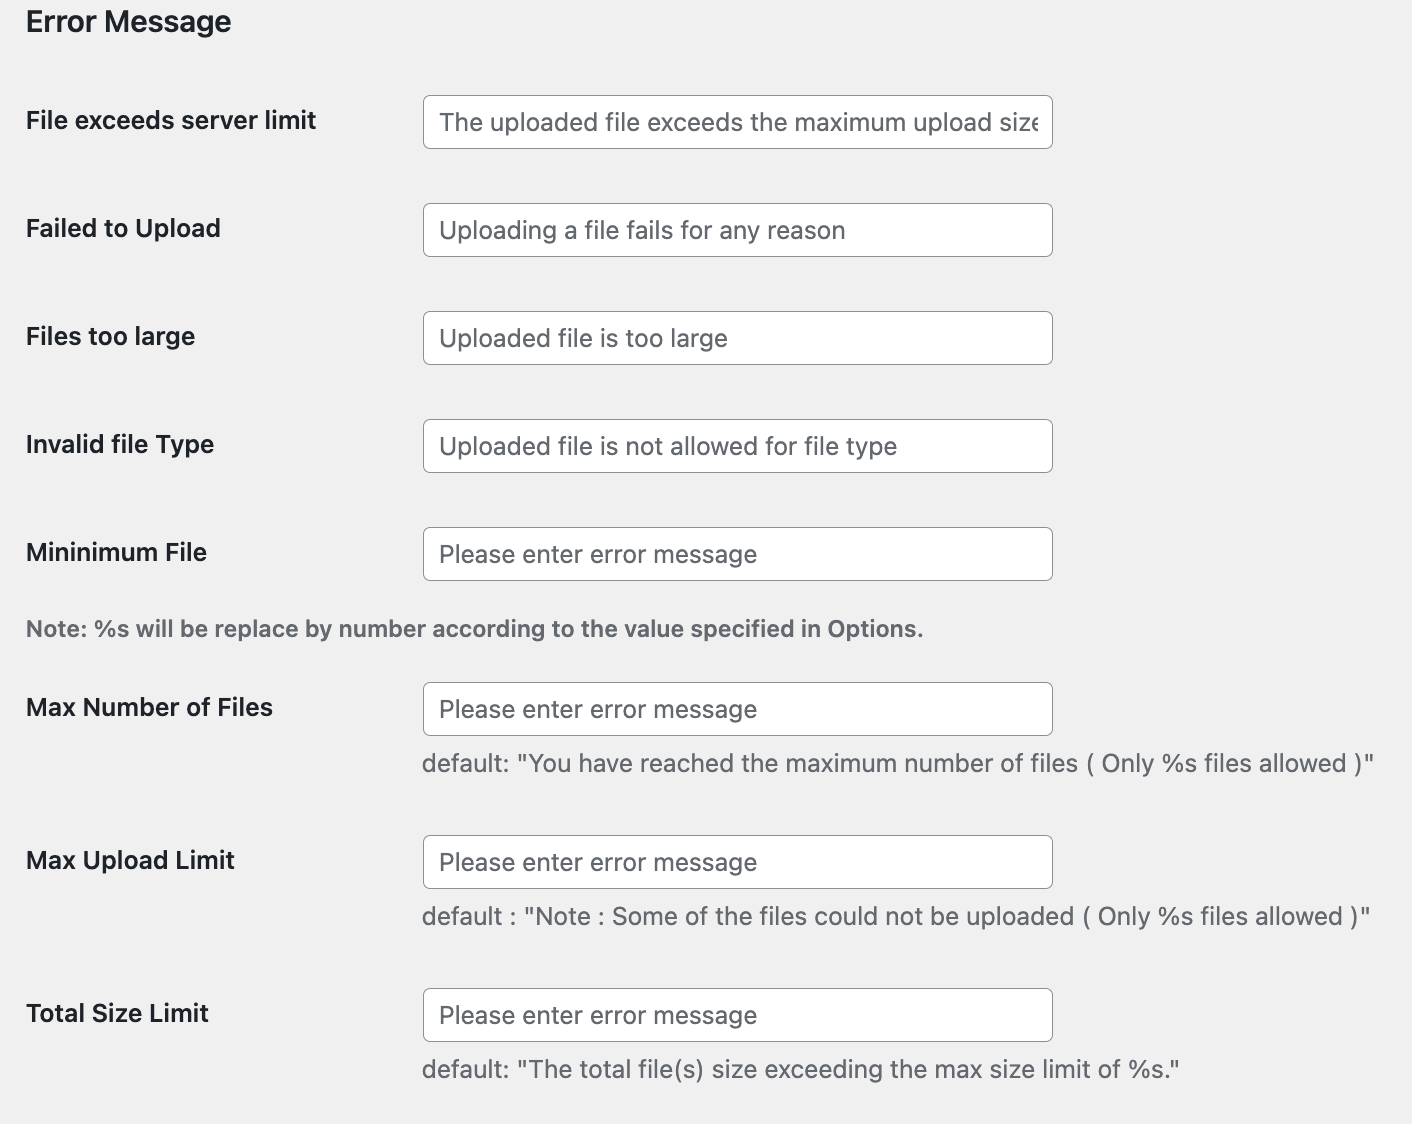
→ Error Messages
You can manage/change all the error messages here.
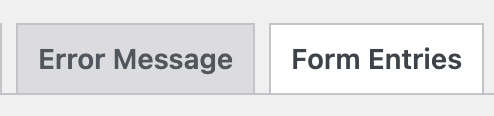
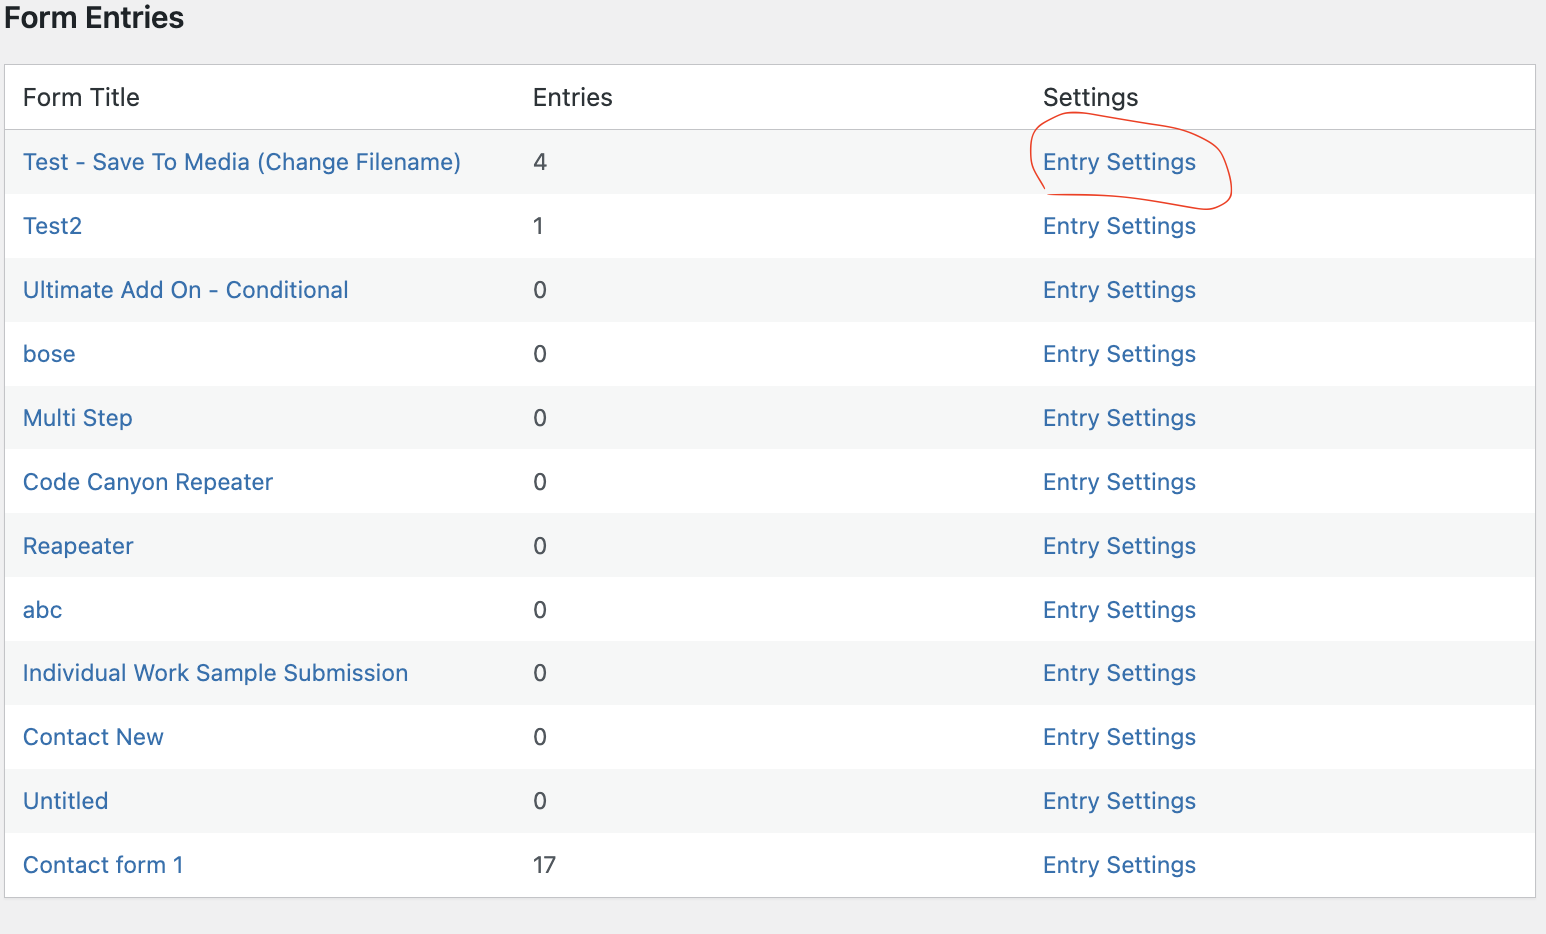
→ Form Entries
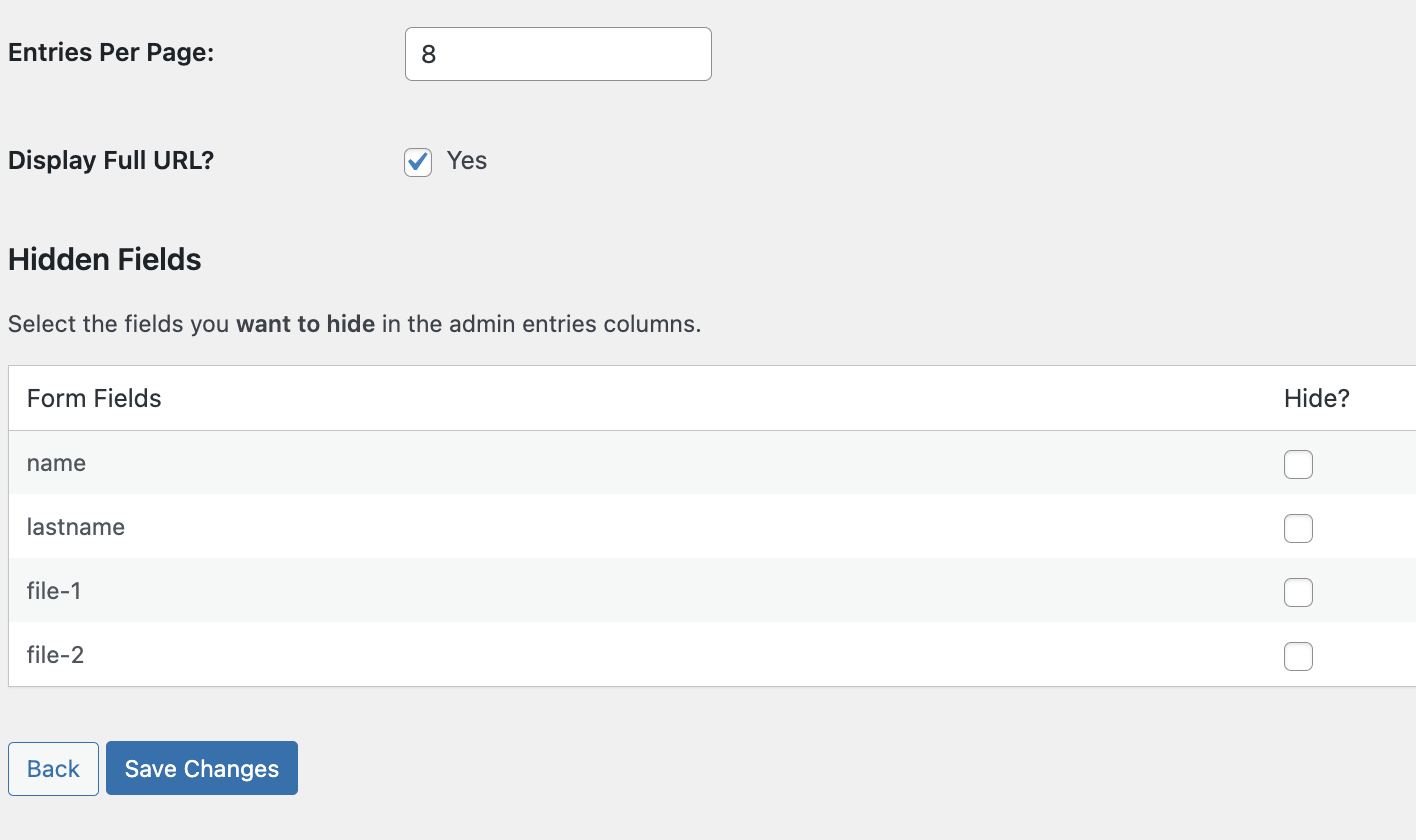
All stored entries will appear here. You can also change the display per page and hide fields in columns by clicking the 'Entry Settings' link.
Entries Per Page - Adjust the number of items to display in the table.
Display Full URL? - Whether to display the full URL or just the filename.
Hidden Fields - Select which specific field you want to hide in the column table, then click "Save Changes".
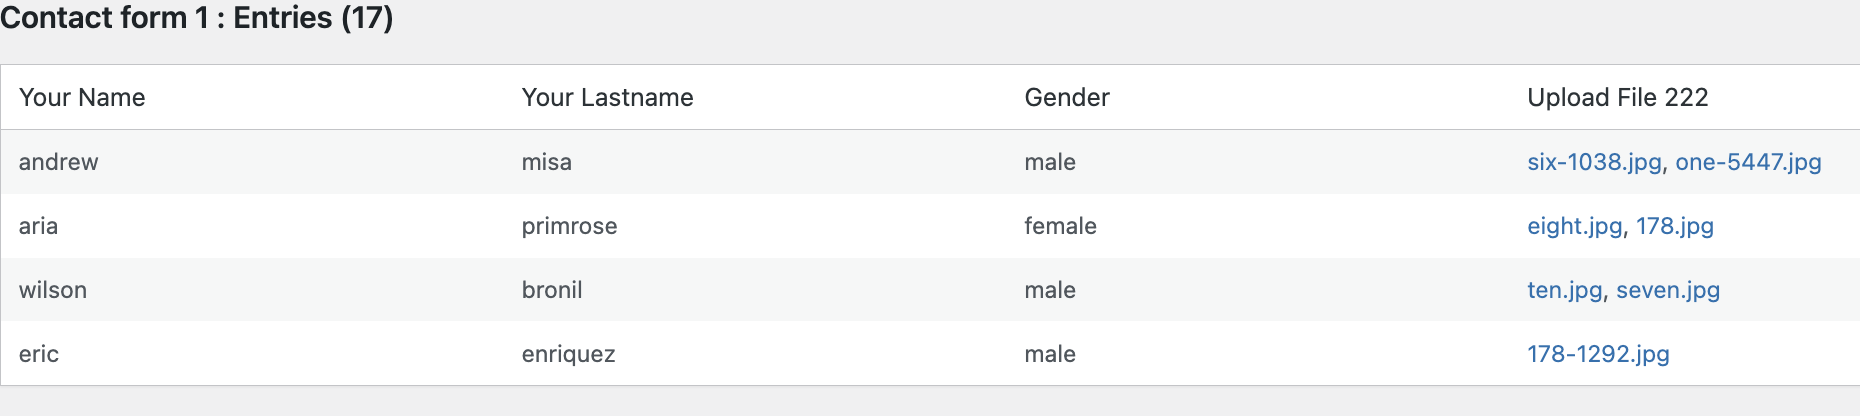
Here you can see all entries and the content of each field.
→ Debug
This is for developers only, and it applies when they request to enable debugging and include their email address.
Remote Storage
This option allows you to choose between local and remote storage options. If remote storage is selected, it will provide the option to save files to FTP, Dropbox, Google Drive, or Amazon S3.

→ FTP
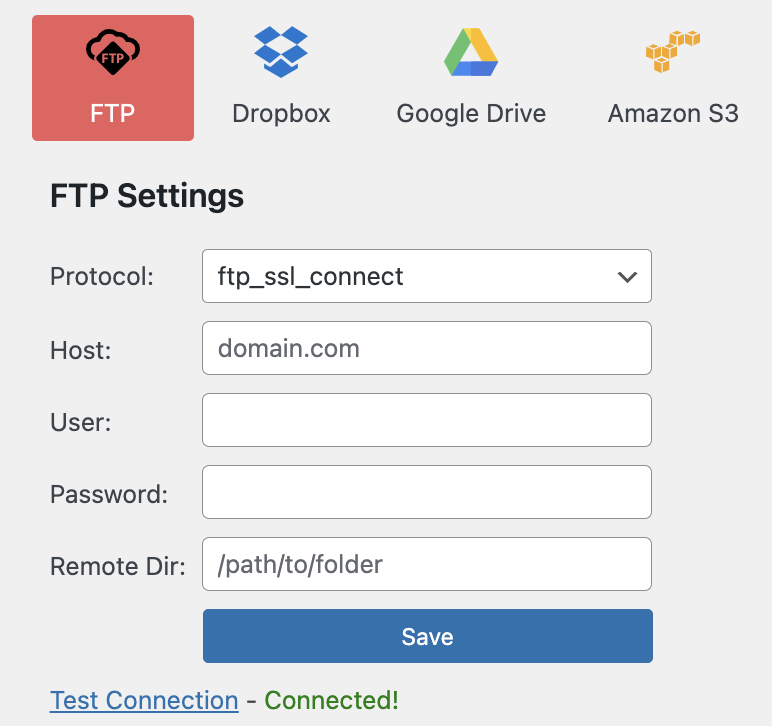
Protocol - If there is an issue or you are unable to connect, consider switching between ftp_connect and ftp_ssl_connect.
Host - For the host, you may use either the server's IP address or its domain name. (ie: domain.com or 198.187.29.33)
User - Enter your FTP username.
Password - Enter your FTP password.
Remote Dir - Copy full path from filezilla or any FTP application. (see below)
Example: Copy this 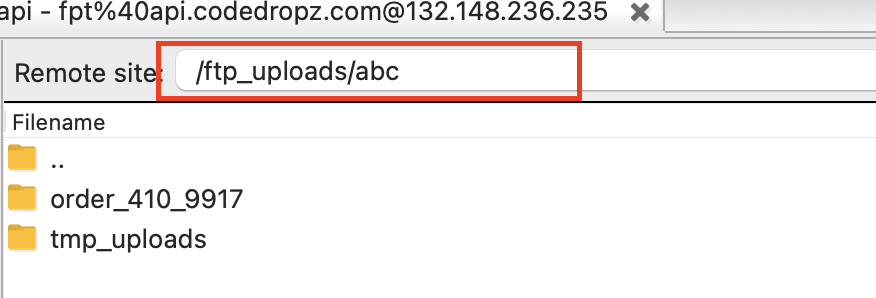 paste it to →
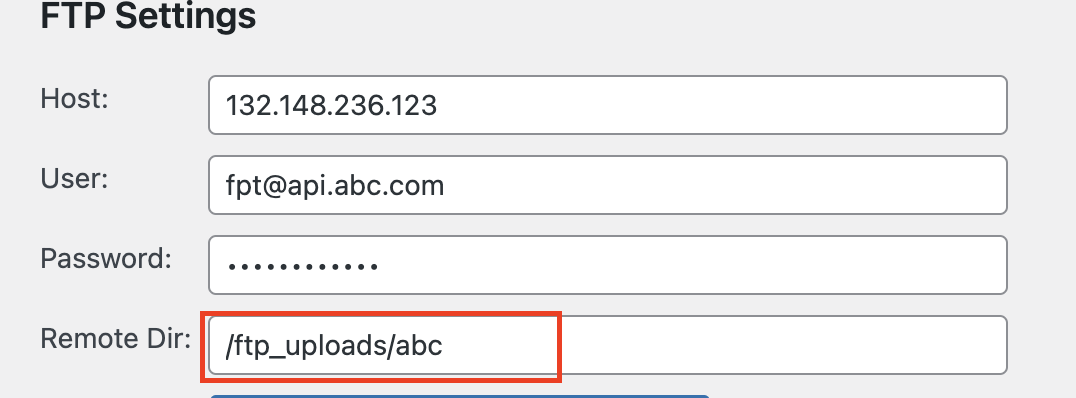
After you have added all the details click save and make sure to click "Test Connection" button
→ Dropbox
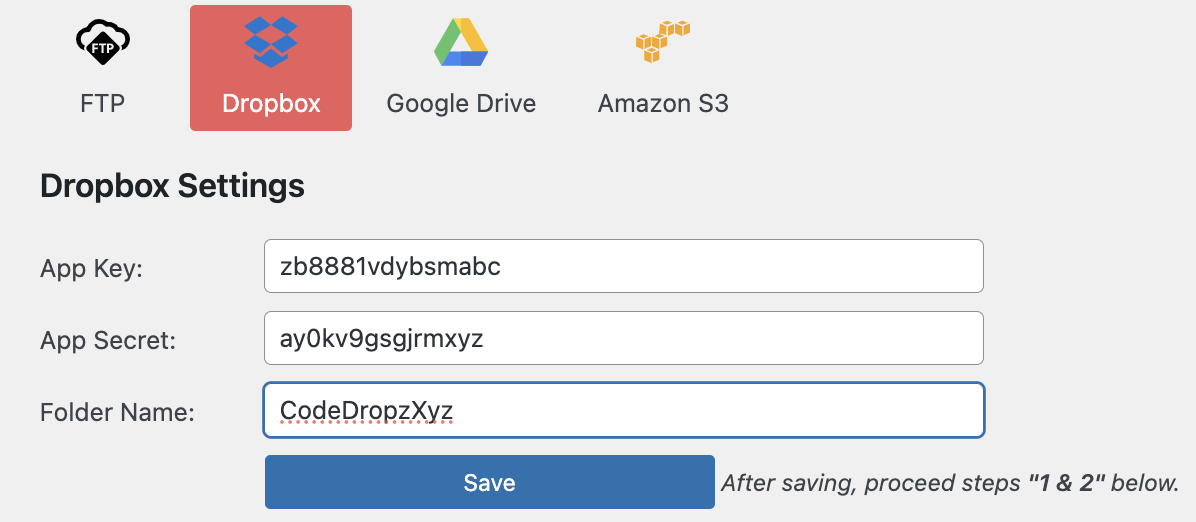
For Dropbox integration, you only need to provide the App Key, App Secret, and Folder Name. Please ensure that the Folder Name has been created on Dropbox beforehand.
After clicking the Save button, proceed to steps 1-3 in the admin options.
Tutotial : https://youtu.be/O_vgeXGNiRE
→ Google Drive
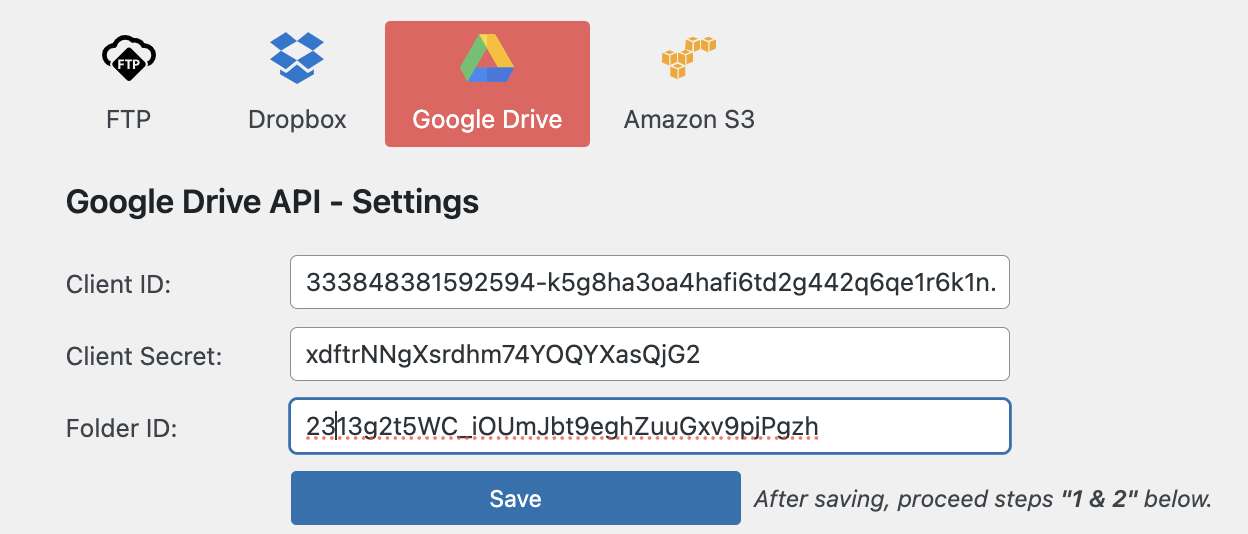
For Google Drive integration, you only need to provide the Client ID, Client Secret, and Folder ID. Please ensure that you have already created a folder name in your Google Drive to obtain the folder ID.
How to determine Folder ID? Navigate to your folder in Google Drive. For example, if the URL was “https://drive.google.com/drive/folders/1dyUEebJaFnWa3Z4n0BFMVAXQ7mfUH11g”, then the Folder ID would be “1dyUEebJaFnWa3Z4n0BFMVAXQ7mfUH11g”.
After clicking the Save button, proceed to steps 1-2 in the admin options.
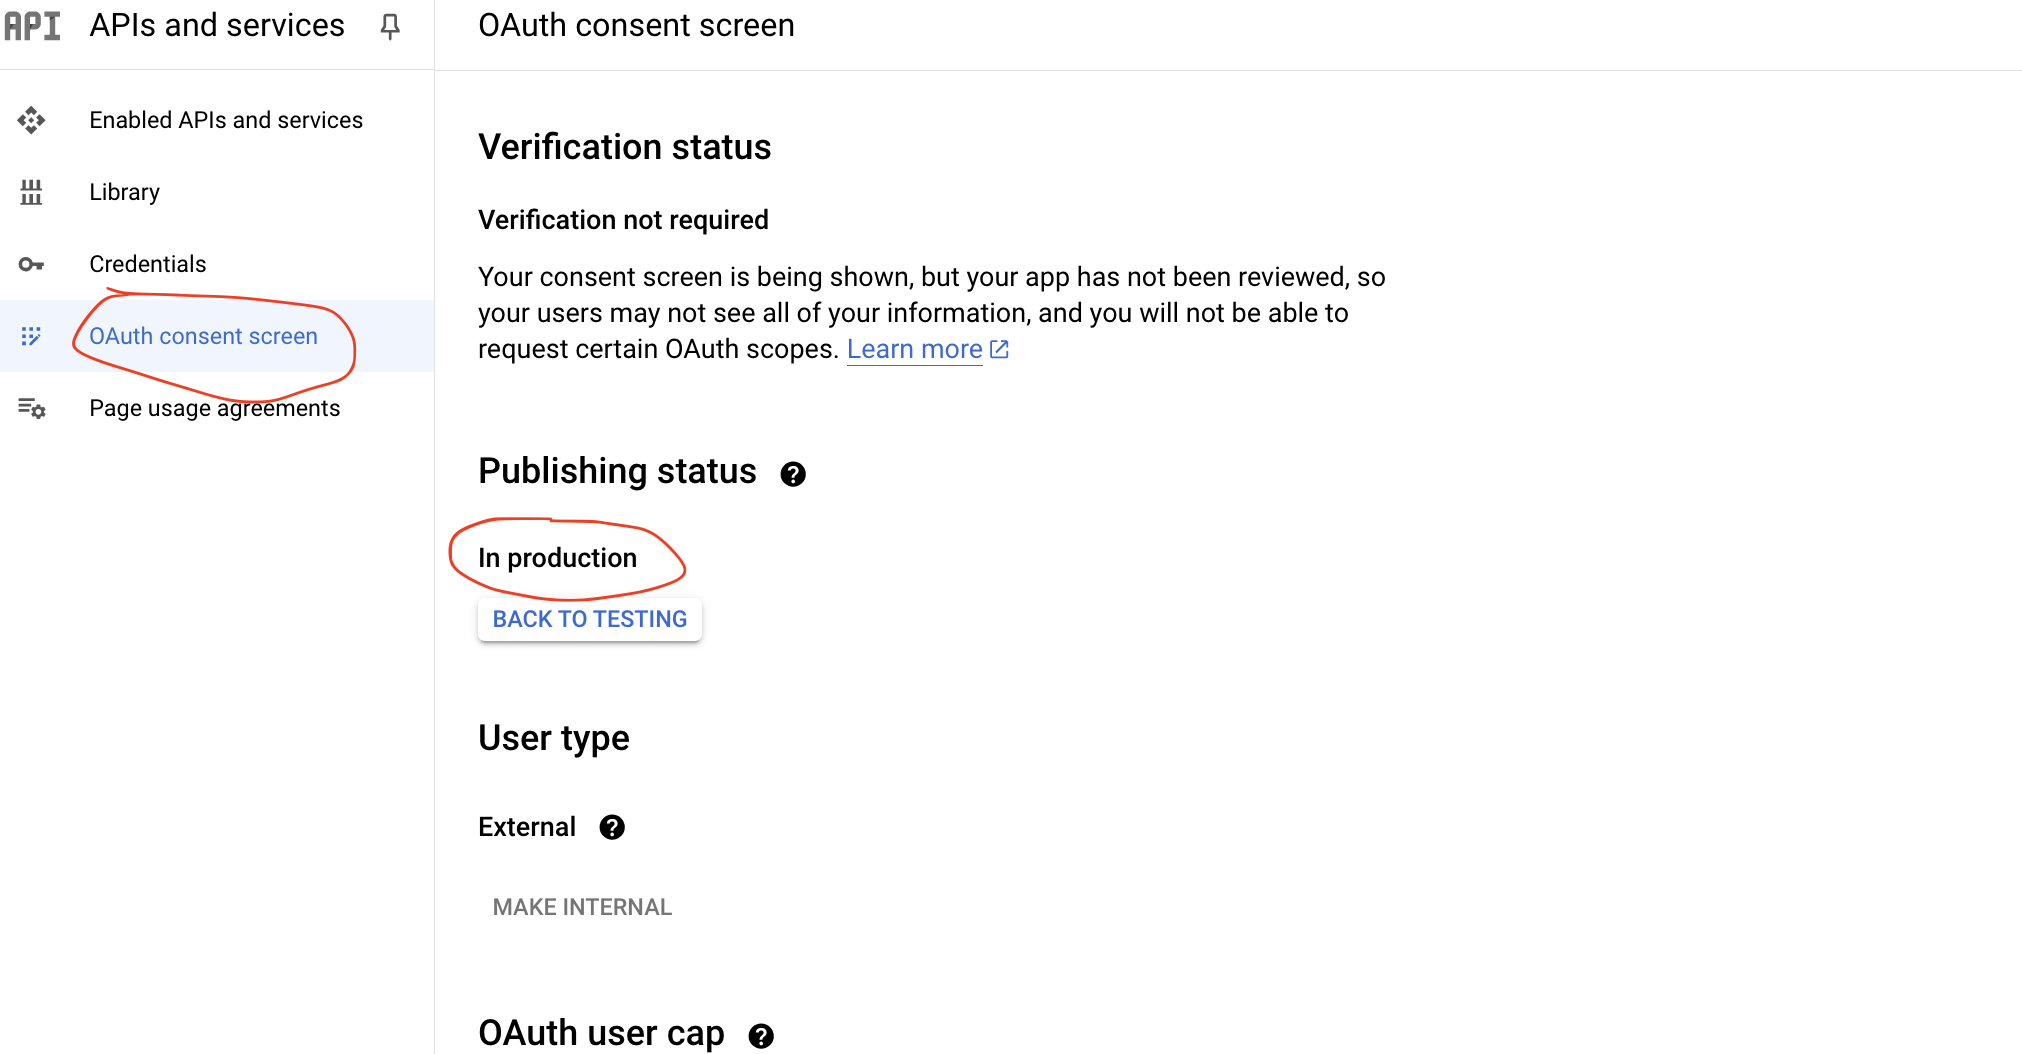
Important Note: You will also need to set the 'Publishing Status' to 'In Production' in your Google Drive app, as the token will expire in 7 days if the status is set to "Testing". (see screenshot below)
Tutotial: https://www.youtube.com/watch?v=GP9CE05yTew
Demo: Watch Demo
→ Amazon S3
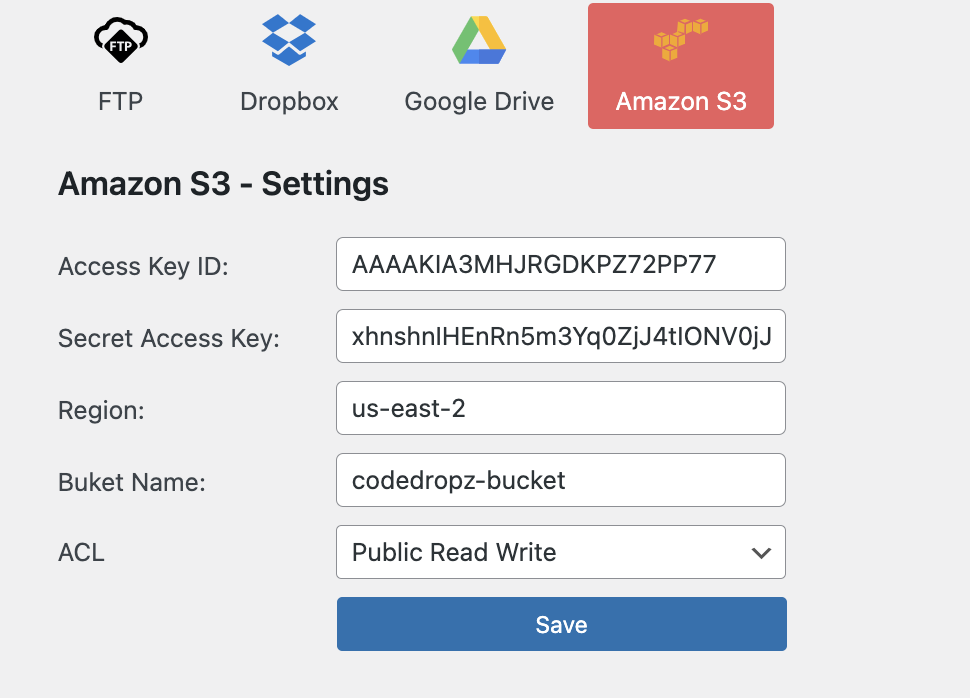
To obtain the access key and secret key, please follow the tutorial below. Additionally, double-check that the region, bucket name, and ACL match the details in AWS.
When you make an S3 bucket public in AWS, it means that anyone with the bucket's URL can access the files in it. However, you may still encounter the “Access Denied” issue when trying to access a file in the bucket. This is because even though the bucket is public, the files within it are still private by default.
Tutotial: How to generate Access Key ID & Secrete Access Key
Support / Request
For any assistance or customization request, you can contact me through my email : [email protected]